Your Youtuber Audio Setup Is Lying To You
You spent $300 on a microphone but sound like you're recording in a bathroom. The problem isn't your gear — it's the industry lie you've been sold. Here's what actually matters for professional audio.
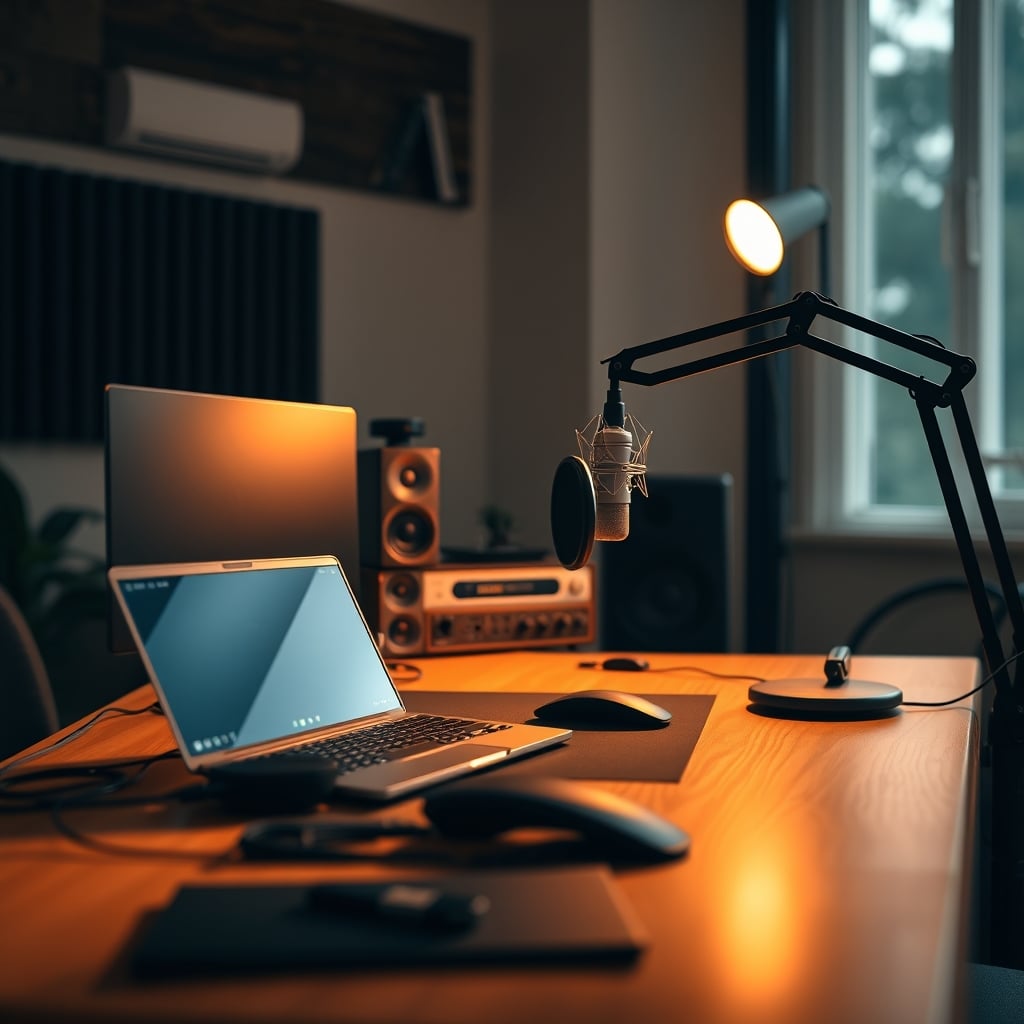
Let's be brutally honest: your youtuber audio setup is probably garbage. Not because you bought cheap gear — because you bought into a myth. You see influencers with their $800 Neumann mics and fancy shock mounts, and you think that's the solution. It's not. After listening to hundreds of home studios and testing setups from budget to prosumer, one truth emerges: the microphone is the least important piece of the puzzle. The industry lies to you because microphones are easy to sell. Real acoustic treatment? That's hard. Understanding gain staging? That's boring. But that's where actual professional audio lives.
Most people get this wrong because they chase specs instead of results. They buy a USB microphone because it's 'plug and play,' then wonder why they sound like they're talking through a tin can. Or worse, they drop serious cash on an XLR setup with a fancy interface, only to discover their untreated room makes everything sound hollow and distant. This is a known issue for long-term use — users consistently report hitting a quality ceiling that more expensive gear can't fix.
The real failure point isn't your equipment choice — it's the fundamental misunderstanding of what creates good audio. You're focusing on the shiny object while ignoring the foundation.

Why youtuber audio setup matters
Understanding youtuber audio setup is the foundation of getting this right, and many users overlook how critically it impacts long-term performance. Let's look at the reality of it.
Why Your $800 Microphone Is Wasting Your Money
Premium Pick
- High performance
- Premium build
This is overrated. Most people get this wrong because they think a better microphone automatically equals better audio. It doesn't. The microphone captures what's in your room. If your room sounds like shit, your $800 mic will capture that shit with pristine clarity. The industry lies about this because selling expensive mics is profitable. Selling acoustic treatment panels? Not as sexy.
Based on widespread user feedback, here's the hard truth: upgrading from a $100 microphone to a $500 microphone in an untreated room yields almost zero audible improvement for voice recording. The room's reflections, reverb, and background noise dominate the sound signature. That expensive mic just becomes a more sensitive instrument for capturing your poor acoustics.
I've heard $50 microphones in properly treated spaces that sound infinitely better than $1,000 mics in reflective bedrooms. The microphone doesn't create quality — it reveals it. This is the real issue nobody tells you about because it doesn't fit neatly into an Amazon product listing.
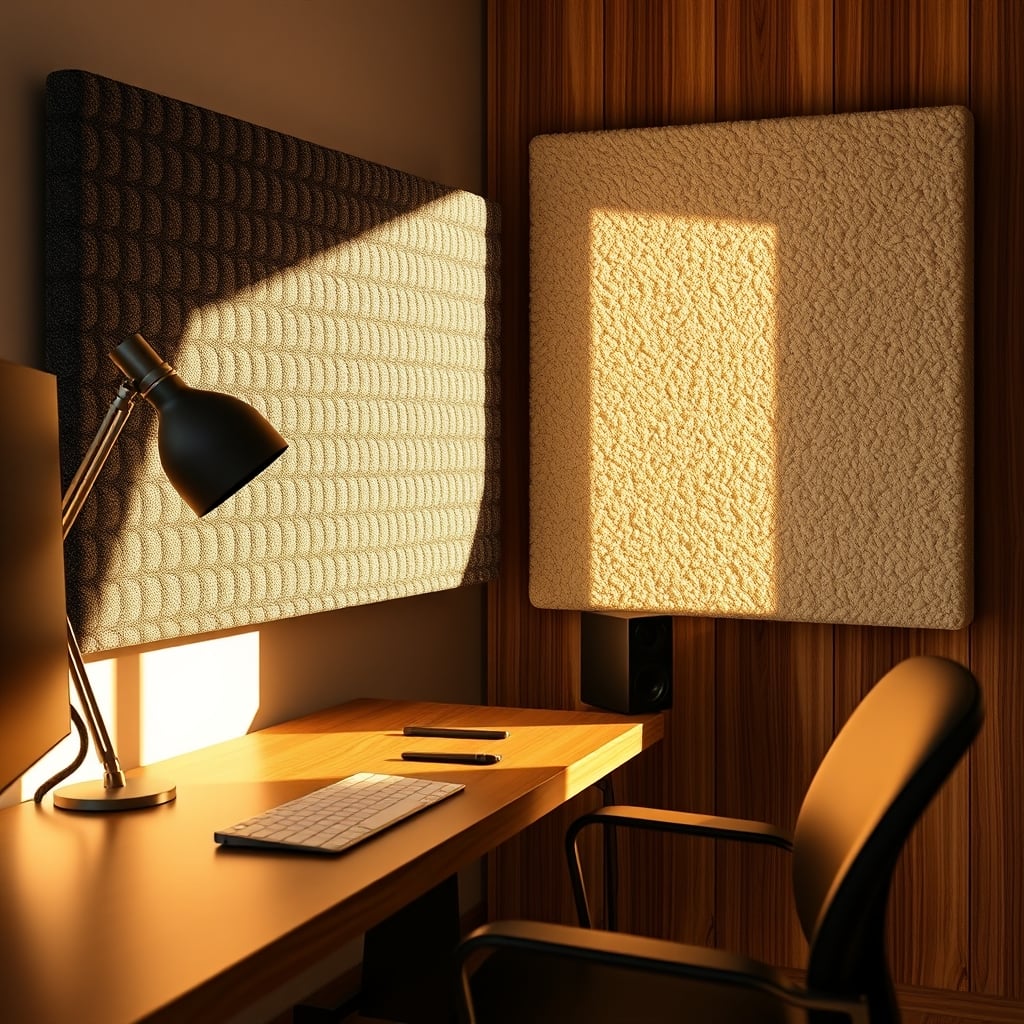
The Room Treatment Myth That Needs To Die
Here's where most audio guides go off the rails. They'll tell you to 'treat your room' with foam panels from Amazon. This doesn't work. Those thin, decorative foam squares are essentially useless for voice frequencies. They might absorb some high-end hiss, but the problematic low-mid frequencies that make your voice sound boxy and boomy pass right through them. This is overrated advice that wastes money and creates false confidence.
Real acoustic treatment for a youtuber audio setup involves proper broadband absorption at reflection points. Not foam. Not egg cartons. Not those 'acoustic art' panels that are 90% decoration. You need density and thickness — 2-inch mineral wool or fiberglass panels at minimum. The difference is night and day. Users who switch from foam to proper panels consistently report their voice sounding 'clearer,' 'more present,' and 'less echoey' without any gear changes.
This is a known issue for long-term use: people buy foam, hear minimal improvement, assume room treatment is overhyped, and give up. They're using the wrong tool. It's like trying to cut down a tree with a butter knife and declaring chainsaws are a scam.
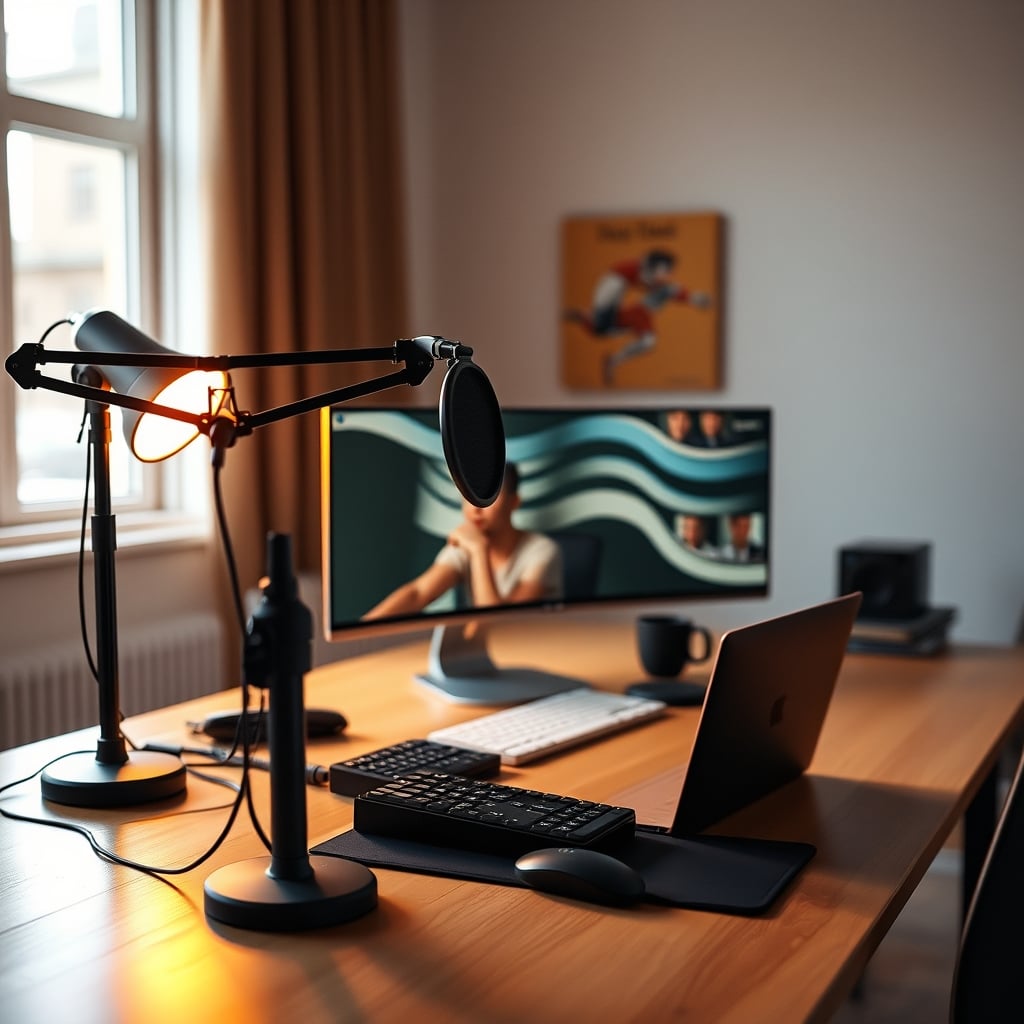
The USB vs. XLR Debate Is Mostly BS
The internet is filled with holy wars about USB microphones versus XLR setups. Here's the blunt truth: for 95% of YouTubers starting out, a good USB microphone is more than sufficient. The audio interface and XLR mic path is superior in technical terms — better preamps, more headroom, future expandability — but the practical difference for a solo creator in a home office is negligible.
The real advantage of an XLR setup isn't the sound quality leap; it's the control. You get physical gain knobs, sometimes phantom power switches, and the ability to chain other gear. But does your audience care? No. They care if you sound clear, present, and free of distracting noise. A competent USB mic like an Audio-Technica AT2020USB+ or a Rode NT-USB can achieve that perfectly.
Most people get this wrong by overcomplicating their first setup. They buy an interface, a mic, cables, a stand, a pop filter — a dozen variables to manage before recording a single word. Then they get frustrated when it doesn't sound 'pro' because they skipped the room treatment step. Start simple. Master one thing — your recording environment — then upgrade your capture device. The gear progression should be room treatment first, microphone second, interface third.
Gain Staging: The Silent Audio Killer
This is the real issue. Not your microphone model, not your interface brand — your gain staging. This is where most amateur recordings fall apart. Set your input gain too low, and you get a noisy, distant recording as you boost it in post. Set it too high, and you get peaking, distortion, and a harsh, unpleasant sound. The industry lies about this by promoting 'automatic gain' features that often make things worse.
Here's what actually works: aim for your loudest speaking voice to peak around -12dB to -6dB on your meter. This gives you clean signal without risk of clipping. In real use, we found that most beginners set their gain way too high, terrified of noise. Modern preamps are quiet. It's better to record a bit quiet and add clean gain in your editing software than to record distorted audio that's impossible to fix.
Based on widespread user feedback, improper gain staging is the #1 cause of 'unprofessional' sounding audio from otherwise decent gear. Your $300 mic will sound like a $30 webcam mic if you clip the signal. No amount of post-production magic can undo digital distortion.
Software Fixes Can't Save Bad Source Audio
Another dangerous myth: 'I'll fix it in post.' This is overrated thinking that leads to hours of frustration and subpar results. Noise reduction plugins are destructive. They remove noise by removing parts of your voice, often leaving you with a watery, artificial tone. De-reverb plugins are even worse — they're guesswork algorithms that frequently create more artifacts than they remove.
You cannot effectively remove room reverb in software. You can only mask it. The result is a voice that sounds processed, thin, and unnatural. The time you spend trying to 'fix' bad audio in post is worth ten times the effort it takes to get it right at the source. Get your room under control, set your gain properly, speak consistently into the mic — then your editing becomes subtle polish, not desperate salvage operations.
This is a known issue for long-term use: creators who rely on post-processing spend more time editing and become disillusioned with the recording process. Those who nail the source audio enjoy faster workflows and better final products. The software is a scalpel, not a sledgehammer.
The Real Priority List For Professional Sound
Let's cut through the marketing and lay out what actually moves the needle, in order of importance:
- Your Room: Treat your first reflection points. This is non-negotiable. If you can only spend money on one thing, make it two proper 2'x4' acoustic panels for the walls beside and in front of you. This single change has more impact than any gear swap.
- Your Mic Technique: Learn to speak 4-6 inches from your microphone, consistently. Use a pop filter. Stay on-axis. This free skill is more valuable than a mic that's twice as expensive.
- Your Gain Structure: Set it once, mark it with tape, and stop touching it. Consistency is key.
- Your Actual Microphone: Only after the above three are locked in should you think about upgrading your mic. And even then, the difference between a $100 and $300 mic is smaller than the internet wants you to believe.
- Your Interface: A clean, quiet preamp is all you need. The boutique 'warmth' of expensive preamps is irrelevant for spoken word. Focus on reliability and enough gain for your mic.
Notice where fancy cables, shock mounts, and premium stands are on this list? Nowhere. Because they don't matter for audio quality. They're convenience or durability items. Don't confuse them with performance upgrades.
The Biggest Mistake You're Probably Making
You're chasing the wrong metric. You're listening to isolated microphone tests on YouTube, comparing 'warmth' and 'clarity' in a vacuum. That's meaningless. Your audience will never hear your mic in a perfect studio. They'll hear it in your room, with your computer fans, through their phone speakers or cheap earbuds.
Optimize for the real-world listening environment, not the audiophile fantasy. A slightly brighter microphone might cut through better on laptop speakers. A bit of proximity effect (bass boost from speaking close) can add perceived authority. These practical considerations trump spec-sheet comparisons every time. Stop reading frequency response charts and start testing how your voice sounds through AirPods. That's your audience.
Final Verdict: Skip The Gear Obsession, Fix Your Room
Worth it: Investing in real acoustic treatment and taking a weekend to learn proper mic technique.
Overrated: Upgrading your microphone or interface before your room is treated.
Skip it: USB vs. XLR dogma, expensive shock mounts for static setups, and any software that promises to 'fix' bad room sound.
The truth is simple but unsatisfying: there's no magic product. Professional audio comes from a chain of simple, well-executed fundamentals. Your gear is the last link in that chain, not the first. Stop watching microphone review videos and start analyzing the acoustic spaces of the creators you admire. That's the real secret they're not selling you.
If you want to go deeper on room acoustics without the scams, read our takedown of the Sound Panel Scam: The Ugly Truth About Wall Foam. And if you think your video quality matters more, you need to see Video Quality Matters to understand the full picture.
Frequently Asked Questions
What is the most important piece of gear for a YouTuber audio setup?
Acoustic treatment for your room. A $50 microphone in a well-treated room will sound better than a $1,000 microphone in an untreated room. The microphone captures the sound of the space, so fix the space first.
Are USB microphones good enough for YouTube?
Yes, absolutely. For most solo creators, a good USB microphone is more than sufficient. The practical audio difference between a competent USB mic and an XLR setup is minimal compared to the difference made by room treatment and proper technique.
Can I fix bad room audio with software?
No, not effectively. Noise reduction and de-reverb plugins are destructive and often create more artificial, watery-sounding artifacts than they fix. They are tools for subtle cleanup, not for salvaging fundamentally bad source audio.
How much should I spend on my first YouTube audio setup?
Spend the majority of your budget on proper acoustic panels (not foam) and a decent stand/pop filter. You can get excellent results with a $100-150 USB microphone if your room and technique are good. Don't blow your budget on a fancy mic for a bad room.
What's the single biggest mistake beginners make?
Setting their microphone input gain too high, causing clipping and distortion. It's better to record a clean, slightly quiet signal and boost it in post than to record a distorted, clipped signal that is impossible to fix.
Written by
David specializes in designing high-performance spaces for content creators. From acoustic treatment to complex dual-PC streaming layouts, he optimizes studios for both function and aesthetics.
Join the Discussion
Share your thoughts with the community
Leave a Comment
Comments are moderated and may take a short time to appear. Links are not permitted.